3.4.7 The Render Window
The Render Window pops up whenever you render a scene with the POV-Ray 3 display option (+d) set. This option is
set ON by default in POV-Ray for Windows.
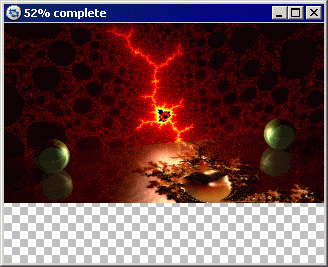
The Render Window shows the scene as it is being rendered. It has its own Context
Menu.
If you close the Render Window you can re-display it by selecting Re-display from the Render Window submenu in the Options
Menu, or by pressing the 'Show' button on the toolbar.
WARNING: just because you can see the image in the Render Window does
not mean it is being saved to disk, or that it can be saved to disk. In many cases the data stored for display
purposes is different than the data stored in an output file. If you don't have Output_To_File
switched ON (this is the default, unless you have turned it off) then you will not get an output file and once the
render is finished it is too late. If you want an output file you must select it before you start rendering.
We realise that this is different from many Windows programs, but the resources needed to store a full version of a
rendered image in memory (especially if it's large) could often be best used elsewhere. The Render Window
is only meant to be a preview of the final image. It is there for convenience.
Don't forget that if you choose (via an INI file) to have images written to a default directory, then that is where
they will be unless you override this behavior. If you didn't select this option then the file will be written to the
current directory. Specifying an output file name that consists of only a path, such as c:\images\, will cause the
output file to be written to that directory. POV-Ray determines if the filename is a path by looking at the last
character and making sure that it is a '\'. Note that the directory must already exist.
Note that to disable the Render window, you must specify the '-d' option on the command-line, or the text
'Display=Off' on the command-line or in one of the INI files processed. Simply closing the render window after it is
created does not free up the memory used by it.
If you are running a high-resolution render, and have a high-color or true-color display, you can save a
considerable amount of RAM by turning the render window off. Users of 8-bit display systems can save a smaller amount.
The amount of RAM used by the render window can be calculated as render width * render height bytes, in the case of
8-bit displays, or render width * render height * 3 bytes, for high/true color displays. For example, on a true color
system, a render of a 1024x768 pixel image will require about 2.4 megabytes of image buffer (even if you hide or
minimize the render window). The only way to avoid this is to turn the render window off before the render starts.
If you have a high or true color display, selecting the Options|Render Window|Force 8-bit Display option will cause
only one-third of the memory to be allocated for the render bitmap, since the data will be stored (and displayed) as
8-bit pixels instead of true-color (24-bit). Needless to say, this has absolutely no effect on the output file.
See also Speed Considerations.
More about "Speed Considerations"
|


